Showing posts with label Maple Syrup. Show all posts

Tuesday, February 21, 2012

Self-Layering Pecan Pie Cake

 Okay, I'm going to be honest with you... this actually was not at all what I intended on getting when I made this recipe, it truly was supposed to be Pecan Pie. - However, the result I got is quite lovely and some of best discoveries are made by accident. This is a truly UNIQUE dessert, I have never had anything like it. It's super crispy on the outside with a really heavy moist layer and really light and fluffy layer. To tell you the truth, everything separated into layers on it's own. That is why I call it "Self-Layering" - Pecan Pie Cake.
This is a great image of the layers on the left. The top layer is a crispy nut layer, the layer just below that is a cakey, maple flavored layer, the layer just below that is a heavy, moist, eggy, maple flavored layer and the layer just below that, the bottom layer, is like lightly sweetened pie crust. - I just stumbled on this tonight as I attempted to invent my own Pecan Pie recipe, it turned into this. I have indeed sampled it myself, as well as a few other people and thus far, two thumbs up! It's an incredibly unique, dessert eating experience with the different textured layers and flavors.
Self Layering Pecan Pie Cake:
CRUST:
1 and 1/3 Cups Almond Flour or Meal
2 Tablespoons Melted Butter OR Oil
2 Tablespoons Maple Syrup or Liquid Sweetener

PECAN PIE CAKE:
1/4 Cup Melted Butter OR Oil
2/3 Cup Maple Syrup or Syrup of some kind
1/2 Teaspoon Salt
3 Large Eggs
1 and 1/2 Cups Chopped or Ground Pecans/Nuts

Preparation: Begin by heating your over to 350 degrees, Butter or Oil/Grease your Pie Plate. Mix Almond Flour, Butter and Syrup crust mixture and press it into JUST the bottom of the Pie Plate. Bake for 10-12 minutes. (I did 12 minutes)  Then start preparing the filling, in a medium sauce pan, melt 1/4 Cup Butter over Medium-Low heat. Add Syrup and Salt once Butter is melted. In a separate bowl, whisk the 3 Eggs until thoroughly mixed. Pour the Egg mixture into the sauce pan, stirring until well combined. Mix in the nuts and continue to heat for another 1-2 minutes. Remove from heat and once your Pie Crust is done baking, pour the filling mixture into the Pie Plate and bake for another 35-45 minutes until it is fully set and no longer jiggles. (I did 40 minutes) A butter knife inserted in the center should come out clean. Allow to cool slightly, then cut, serve and enjoy!

I am particularly curious about everyones thoughts and comments on this recipe. Does this sound interesting? Does this sound good? (It is good, even if it doesn't sound good) Would you like to try this recipe? Have you tried it and got something to say about it? I'd love to hear from you, just leave your message in the comments below.
- Until next time, I wish you Peace, Health and Happiness!
This Post has been linked to Healthy 2Day Wednesday!

Monday, February 13, 2012

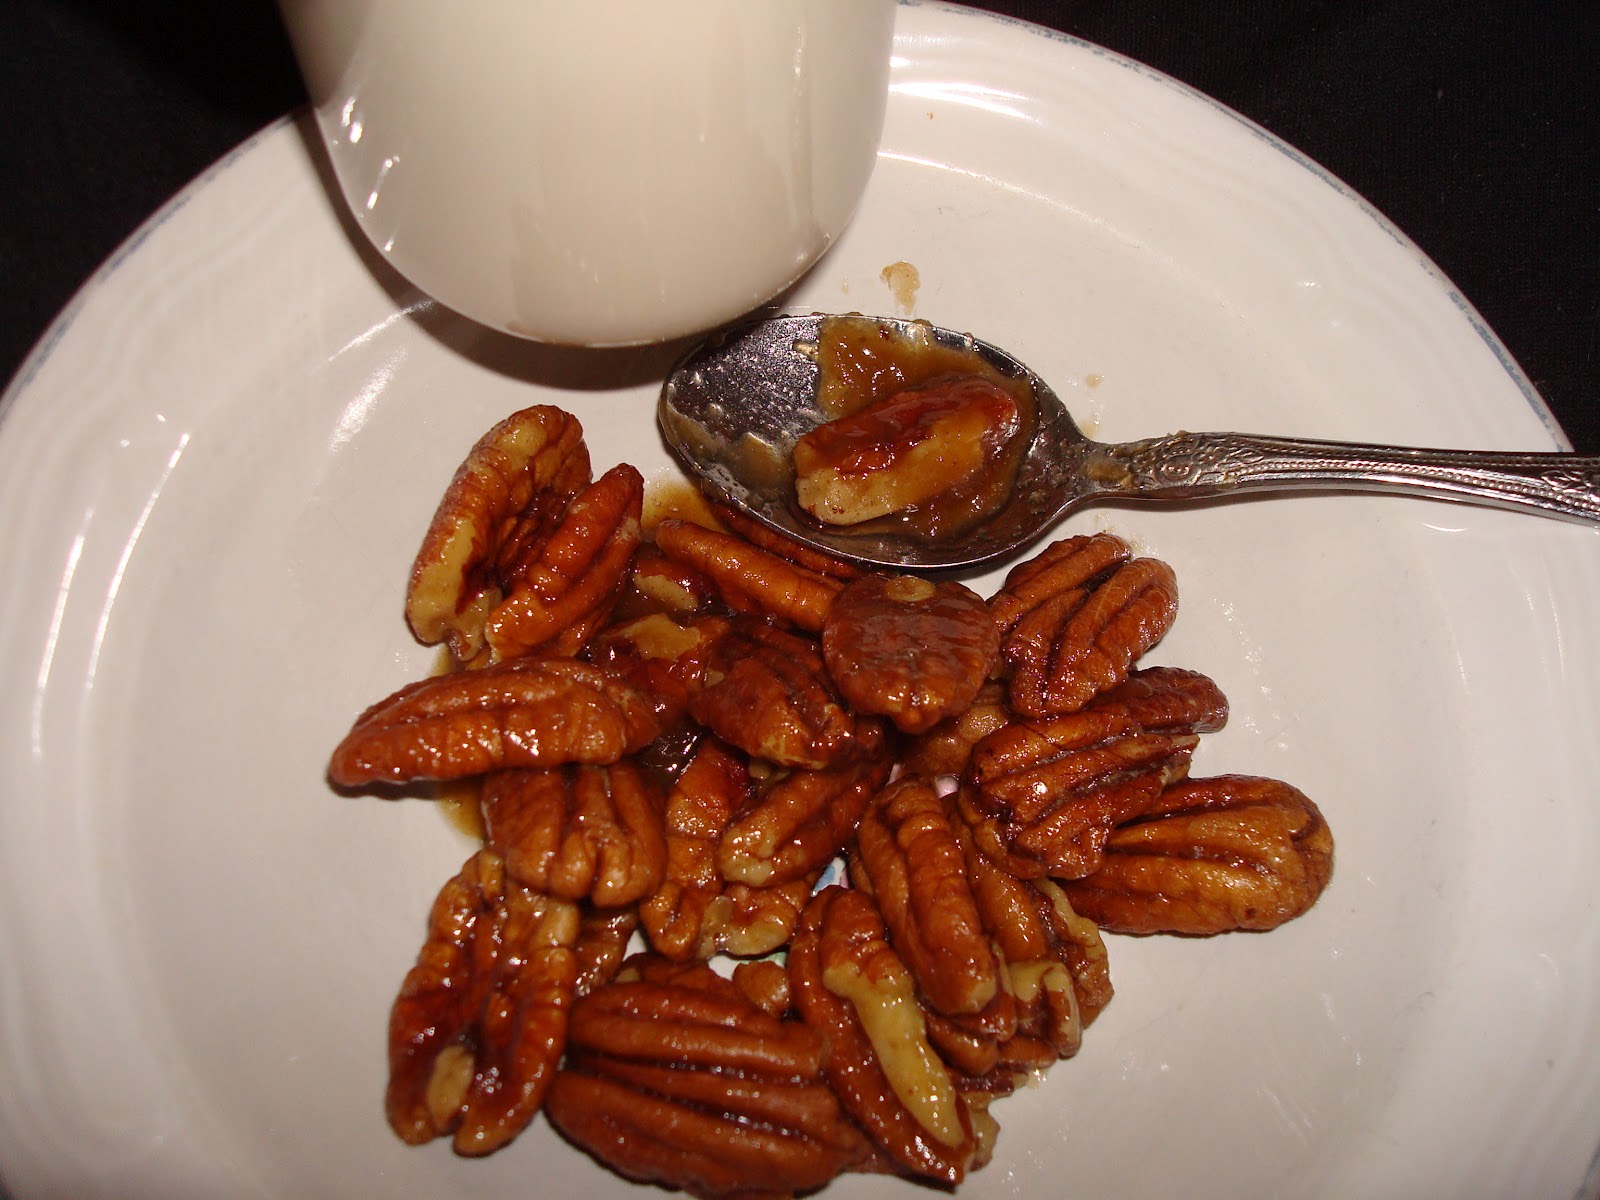
Sweet Glazed Pecans

Sweet, buttery and luscious! - These make a delicious snack and happen to be one of my favorite combinations. Sweet Protein. See, I have problems with my blood sugar. So I practice the fine art of trying to make my sweets as protein packed as possible to prevent the spike and crash roller coaster.   - This is like natures popcorn only better because Pecans are so healthy and they make the perfect nut for this job. They are easier to chew, not like the harder nuts that make you feel like you're going to break a tooth AND they are naturally mild in flavor.

Don't forget that Nuts contain anti-nutrients
and it is best if they are soaked prior to eating.


So YumMmmMmmy!!!
Sweet Glazed Pecans:
1/2 Cup Pecans
1 Tablespoon Butter
2 Tablespoons Maple Syrup
 -  Directions :
Place Butter (Or Coconut Oil) in a frying pan and melt, add Maple Syrup and lightly fry the Pecans over medium - high heat for 5-10 minutes.
Be CAREFUL - These WILL be Very HOT! - Allow to cool and get to snacking. These are fantastic with a glass of Almond Milk on the side and they satisfy a sweet tooth in a very healthy, protein filled way.
  -  Enjoy!

Any questions or comments? Have you tried making these? How did they turn out? What did you think? Do you have any additions, suggestions or tips? We're listening. Please feel free to share in the comments below.  - Until next time, Peace, Health and Happiness!

French Toast Scrambled Eggs

Have you made yourself French Toast and you wondered to  what do with the left over Egg mixture?  - Well the perfect answer to this question is ------------------------
French Toast Scrambled Eggs!
 - It probably sounds a little strange but it is quickly growing to be my favorite breakfast, second only to my Something Cereal which is fantastic for mornings when you're in hurry or want something cold. French Toast Scrambled Eggs are a sweet and protein packed way to start the day, one in which I throughly enjoy.

I am going to be completely honest with you, I regularly go out of my way to make my eggs this way, whether I am making French Toast or not. In the picture above you'll see I made mini French Toast with some thinly sliced, day old Chebe Rolls. However I frequently make these Eggs on their own and sometimes I pour a little Almond Milk over the top which makes a delicious and nutritious, sweet but protein rich warm "Cereal."     - 
It's sweet, cinnamony and oh so tasty. I've made these a lot lately! 
French Toast Scrambled Eggs:
2 Eggs
2 Tablespoons Maple Syrup
1-2 Teaspoons Cinnamon
4 Tablespoons Almond Milk or Other.
--- Whisk ALL ingredients in a bowl until mixed well and pre-heat a skillet to medium-high heat. Melt 1-2 Tablespoons Butter or Oil in the pan and add Egg Mixture and scramble them as you would any scrambled eggs.  -  Serve on a plate alone or in a bowl with milk of your choice, optionally you can drizzle on more maple syrup. Mmm, Mmm Tasty!

If you love French Toast but haven't found any bread substitutes that you like or that fit your diet, you can still enjoy all the flavors, minus the bread... with this recipe. When served in a bowl of milk, it is strikingly similar to a breakfast my Mother made me as a child. She would served cooked rice in a bowl of milk with melted butter, cinnamon and sugar. It brings back wonderful memories of breakfasts gone by. 


Have you got any creative, healthy breakfasts you or your family just love? Please post in the comments and share with us, we'd love to hear them. Or if you have any comments on this recipe, we'd love to hear those too.
 - Until next time, I wish you Peace, Health and Happiness!

Wednesday, February 8, 2012

Something Cookies and Cereal!


Yeah, that is kind of strange title for Cookies and Cereal isn't it? I'll tell you why I chose that name. Right after I made these cookie for the first time, I thought to myself... "Wow, that tastes just like something I used to eat before I changed to a real food diet!" - They are of course very addicting because they remind me so much of something I once loved but what was that something? I never figured it out. Even more interesting is how everyone who tasted them said a similar thing. They all said "Man, this tastes like something! but what?..."  - some had ideas or eventually figured it out but they were all different. One person said "It tastes just like a waffle cone!" and another replied "No, it tastes exactly like Cowtails!" (Those cylindrical carmel, cream filled chewy, candy sticks. Not an actual cow tail, lol.)

These cookies are super addictive and I usually end up eating half of them before I am even done baking them all. They are a thin cookie but they have a nice slightly crisp on the outside, chewy on the inside texture. I always bake these on parchment paper though because stick pretty bad, especially if you prefer to make them chewier, rather than crispier because they come off quite easily when cooked crisp but half of them tends to stay on the pan if you go for chewy. Or maybe that is just because I am always pulling them off while still warm and eating them long before they are ready, lol I am not sure. Either way, these taste great and are simply amazing and who here that has gone grain free doesn't miss cereal? ACTUAL cereal with a nice crisp texture that you toss into milk or milk substitute and eat freely? I know I have missed cereal desperately.

But now that I have experimented with my Something Cookies recipe, I have also discovered Something Cereal and it is fabulous in a bowl of Almond Milk. It's crispy, it's satisfying, it's sweet but nourishing, it's the perfect balance. I just make up a batch of Something Cereal, bake it and store in an air-tight container. Then for the next few days I can eat cereal and Almond Milk and be happy as a clam for breakfast. Well I suppose I should get to sharing the recipe, now shouldn't I?

Something Cereal before being baked.

"Something" Cookies:
We call these "Something" Cookies because everytime someone take a bite of one of these cookies for the first time they always say "This tastes just like something!" and my family has been back and forth about what they may or may not taste like but one thing is for sure, they taste absolutely amazing! and they remind
everyone of "Something"

1 cup Almond Flour
1/4 Teaspoon Baking Soda
1/4 Teaspoon Sea Salt
1/2 cup Maple Syrup
1 Egg OR Flax/Chia Gel if you are allergic to Eggs, though I haven't tried this, it should work.

Just throw all these ingredients into a single bowl and mix with a wooden spoon, couldn't be simpler. After it is all stirred together, you will see this is an incredibly runny cookie dough. That's okay, because you can just take a spoon or measuring spoon and spoon some out onto parchment paper lined baking pans. You may or may not want to butter or grease the parchment paper, I never do but it can stick if you don't. Smaller amounts are better because this will spread. I usually do about 1/4 of a tablespoon size cookies. Bake at 350 degrees for 10-15 minutes. I know that is quite a discrepancy but it depends on how crisp you want them. I usually do 12 minutes for my cookies.

***NOTES:  The longer you bake, the more crisp they will be. The less time you bake them, the harder they will be to remove from the parchment paper. Always allow to cool for several minutes before trying to remove them. The center of cookies that are baked less will be almost caramel like. The less you bake them, the chewier they will be when they are cooled. The longer you bake them, the crispier they will be when cooled and the easier they will be to remove from the pan after cooling. These cookies come out quite thin but they make up for it in flavor.
****TIPS: These would make great sandwich cookies if you put frosting in the middle OR they would be excellent Grain Free/Gluten Free ice cream sandwich cookies. 

*    "Something" Cereal:
Follow the same recipe as above only put tiny drops of batter, the size you desire. I aimed for about Pea sized drops and after baking they became Dime/Nickel sized cookie bites. Bake at 350 degrees for 5-10 minutes depending on taste, you really do want these crisp, so try to let them bake until thoroughly cooked crisp. When cooked crisp they slide right off the parchment paper, even without buttering or greasing the
paper. Then store in a ziplock bag or air tight container and use as cereal, in a bowl of whatever milk or milk alternative that you want. Or you could use them as bite size cookies, snacks, trail mix addition or put them on top of ice creams, custards, etc. These are great in Almond Milk!


Until next time, Happy, Healthy baking to all!

Anyone tried making these? How did they turn out? Any suggestions for what else could be done with these? Or do you have a Grain Free Cereal recipe? Feel free to share in the comments below.

I participated in the Healthy 2Day Wednesday Link-Up! and the Monday Mania Blog Carnival!