Showing posts with label Allergy Friendly. Show all posts

Tuesday, February 21, 2012

Self-Layering Pecan Pie Cake

 Okay, I'm going to be honest with you... this actually was not at all what I intended on getting when I made this recipe, it truly was supposed to be Pecan Pie. - However, the result I got is quite lovely and some of best discoveries are made by accident. This is a truly UNIQUE dessert, I have never had anything like it. It's super crispy on the outside with a really heavy moist layer and really light and fluffy layer. To tell you the truth, everything separated into layers on it's own. That is why I call it "Self-Layering" - Pecan Pie Cake.
This is a great image of the layers on the left. The top layer is a crispy nut layer, the layer just below that is a cakey, maple flavored layer, the layer just below that is a heavy, moist, eggy, maple flavored layer and the layer just below that, the bottom layer, is like lightly sweetened pie crust. - I just stumbled on this tonight as I attempted to invent my own Pecan Pie recipe, it turned into this. I have indeed sampled it myself, as well as a few other people and thus far, two thumbs up! It's an incredibly unique, dessert eating experience with the different textured layers and flavors.
Self Layering Pecan Pie Cake:
CRUST:
1 and 1/3 Cups Almond Flour or Meal
2 Tablespoons Melted Butter OR Oil
2 Tablespoons Maple Syrup or Liquid Sweetener

PECAN PIE CAKE:
1/4 Cup Melted Butter OR Oil
2/3 Cup Maple Syrup or Syrup of some kind
1/2 Teaspoon Salt
3 Large Eggs
1 and 1/2 Cups Chopped or Ground Pecans/Nuts

Preparation: Begin by heating your over to 350 degrees, Butter or Oil/Grease your Pie Plate. Mix Almond Flour, Butter and Syrup crust mixture and press it into JUST the bottom of the Pie Plate. Bake for 10-12 minutes. (I did 12 minutes)  Then start preparing the filling, in a medium sauce pan, melt 1/4 Cup Butter over Medium-Low heat. Add Syrup and Salt once Butter is melted. In a separate bowl, whisk the 3 Eggs until thoroughly mixed. Pour the Egg mixture into the sauce pan, stirring until well combined. Mix in the nuts and continue to heat for another 1-2 minutes. Remove from heat and once your Pie Crust is done baking, pour the filling mixture into the Pie Plate and bake for another 35-45 minutes until it is fully set and no longer jiggles. (I did 40 minutes) A butter knife inserted in the center should come out clean. Allow to cool slightly, then cut, serve and enjoy!

I am particularly curious about everyones thoughts and comments on this recipe. Does this sound interesting? Does this sound good? (It is good, even if it doesn't sound good) Would you like to try this recipe? Have you tried it and got something to say about it? I'd love to hear from you, just leave your message in the comments below.
- Until next time, I wish you Peace, Health and Happiness!
This Post has been linked to Healthy 2Day Wednesday!

Monday, February 13, 2012

Sweet Glazed Pecans

Sweet, buttery and luscious! - These make a delicious snack and happen to be one of my favorite combinations. Sweet Protein. See, I have problems with my blood sugar. So I practice the fine art of trying to make my sweets as protein packed as possible to prevent the spike and crash roller coaster.   - This is like natures popcorn only better because Pecans are so healthy and they make the perfect nut for this job. They are easier to chew, not like the harder nuts that make you feel like you're going to break a tooth AND they are naturally mild in flavor.

Don't forget that Nuts contain anti-nutrients
and it is best if they are soaked prior to eating.


So YumMmmMmmy!!!
Sweet Glazed Pecans:
1/2 Cup Pecans
1 Tablespoon Butter
2 Tablespoons Maple Syrup
 -  Directions :
Place Butter (Or Coconut Oil) in a frying pan and melt, add Maple Syrup and lightly fry the Pecans over medium - high heat for 5-10 minutes.
Be CAREFUL - These WILL be Very HOT! - Allow to cool and get to snacking. These are fantastic with a glass of Almond Milk on the side and they satisfy a sweet tooth in a very healthy, protein filled way.
  -  Enjoy!

Any questions or comments? Have you tried making these? How did they turn out? What did you think? Do you have any additions, suggestions or tips? We're listening. Please feel free to share in the comments below.  - Until next time, Peace, Health and Happiness!

Friday, February 10, 2012

Fermented Vegetable Juice and Juicing

                                                       Isn't it a beautiful sight to see all those little Organic Labels?

I am so pleased to tell you all that this past week I had the wonderful opportunity of participating in a Fermented Vegetable Juice Giveaway hosted by Jill of the Real Food Forager Blog and I won! The giveaway featured a wonderful product called Caldwell's Organic, Raw, Cultured Vegetable Juices. I cannot even begin to explain how prompt the delivery was, I am very impressed by this companies fast shipping. It arrived in a nice styrofoam cooler with dry ice packs all around the Juice, so it was already ice cold and ready to sample!

If you are interested in reading more about the benefits of Fermented Cabbage Juice, Jill at the Real Food Forager Blog put together two beautifully detailed and well researched posts called 6 Reasons To Drink Fermented Cabbage Juice. And 8 Reasons To Add Probiotic Food To Your Diet, I found them to be very informative and I learned a lot, it's definitely worth checking them out. Definitely look into her article The Autoimmune Crisis: What To Do About It because it is very eye opening and talks about the connection between gut health and autoimmune disorders. After doing research about the benefits of Fermented Vegetables and Fermented Vegetable Juices, I am excited to incorporate these into my diet. Not only to try them and enjoy their flavors but to see if I might benefit from consuming them regularly.

My prize was a variety pack that contained five, 8oz bottles of Fermented Vegetable Juices, including Beet Juice, Daikon Juice, Carrot Juice, Sauerkraut Juice and Red Cabbage Juice. Freezing these juices is perfectly safe, so I intend on freezing four of my five flavors because it is very important to start introducing Fermented, Probiotic Rich Foods and Beverages very slowly to avoid stomach upset. I am going to look at this as somewhat of an experiment, I'll be starting out with 1 teaspoon of the Fermented Juice in a glass of Raw, Fresh Juiced Juice OR perhaps as a dressing or condiment or just added to my food once cooled, on a daily basis. I'll increase to 2 teaspoons after the first week and move up from there until I reach a daily dose of 2 tablespoons of Fermented Vegetable Juice a day.

I will then report back any changes or benefits that I note and write progress report entries for my blog so you all can read and experience it along with me. I have a multitude of stomach problems and I anxiously await the prospect of this potentially easing some of those issues. I'll be starting tomorrow, Saturday, February 11th - 2012. Coincidentally this will also be the inaugural, maiden usage of my brand new Juice Extractor, so that is also exciting. Anyway, I hope you will all join me on this journey and hopefully we will all learn something and benefit as we go.

Are you interested in purchasing some of these juices for yourself? Then I have great news for you, thanks to Jill, anyone interested in purchasing these juices can get a 10% off discount coupon and place an order simply by clicking this link for Caldwell's Raw, Cultured Vegetable Products!  Please note: This offer is valid until March 3, 2012 for orders over $50. Shipping is free to mainland USA.


Also, don't forget to stop and see my friend Jill, she has a wealth of knowledge available to read on her blog.
And feel free to leave me a comment, ask questions or share your experiences with Fermented Foods and Beverages in the comments below.

Disclaimer: I am NOT receiving any kick-backs, promotions or money for you clicking the links in this article.

Grain Free Tortillas/Crepes

Hello one and all, after doing some experimenting and long missing the wonders of burritos, my family came up with this recipe. These work well as Tortillas or Crepes and I am sure you could do many, many things with them. Simply by adding/removing or changing up seasonings, you could completely alter the way you use them. For instance, a little cumin and other seasonings would make this a perfect Tortilla for Burritos. If you were to add a little sweetener, cinnamon and other seasonings instead you could easily use this to serve cut fruit with a creamy dressing or topping like Cream Cheese or Custard or a Nut Butter.


Grain Free Tortillas/Crepes
(makes about 6 - 8 crepes)

1 Cup Tapioca Flour
1 Cup Water, Milk or Milk Substitute (or combination)
2-3 Tablespoons Coconut Flour
1 Egg
Optional Seasonings
For Tacos/Burritos - 
1/8 Teaspoon Onion Powder, 1/8 Teaspoon 
Garlic Powder, 1/4 Teaspoon Ground Cumin, 
a dash of Salt and a sprinkling of Italian Seasoning.
For a sweeter version - 

1/8 Teaspoon Nutmeg, 1/4 Teaspoon Cinnamon 
and 1 Teaspoon Granulated Sweetener like 
Maple Sugar.

Directions:
Put all the ingredients in a bowl and mix well. Heat a frying pan on medium heat and melt a small bit Butter or Coconut Oil for in the pan. Use Measuring Cup or Soup Ladle to scoop out some batter. Remember, this batter will be VERY runny, like really thin Pancake Batter. Pour it into the pan to coat a thin layer or whatever desired thickness in the bottom of the pan and fry until golden brown, 3-5 minutes per side. You will know when they are not cooked enough as they will be very difficult to scoop and flip. If you are having a hard time with this, you may not be cooking on the first side long enough.
I am sure you can do so many things with this recipe and I would love to hear what some of you try, please post in the comments and share.

Update: I recently made a Coconut Free, Dairy Free Sweet Version of these.

1 Cup Tapioca Flour
1 Cup Water
6 Tablespoons Almond Flour
1 Egg
1-2 Tablespoon Maple Syrup
Instructions are the same as above.
And they were FANTASTIC! I served them with a variety of things, for instance one was served with Cream Cheese and Cherries for my Brother who is NOT Dairy Free. Another was served spread with Creamy, Sweetened Pecan Butter and I loved it! The Creamy Sweetened Pecan Butter was made by tossing my Sweet Glazed Pecans into a food processor and processing for about 5-10 minutes. However this morning I had one filled with my French Toast Scrambled Eggs and it was a fantastic breakfast.
This post is linked to Healthy 2Day Wednesday.

Wednesday, February 8, 2012

Something Cookies and Cereal!


Yeah, that is kind of strange title for Cookies and Cereal isn't it? I'll tell you why I chose that name. Right after I made these cookie for the first time, I thought to myself... "Wow, that tastes just like something I used to eat before I changed to a real food diet!" - They are of course very addicting because they remind me so much of something I once loved but what was that something? I never figured it out. Even more interesting is how everyone who tasted them said a similar thing. They all said "Man, this tastes like something! but what?..."  - some had ideas or eventually figured it out but they were all different. One person said "It tastes just like a waffle cone!" and another replied "No, it tastes exactly like Cowtails!" (Those cylindrical carmel, cream filled chewy, candy sticks. Not an actual cow tail, lol.)

These cookies are super addictive and I usually end up eating half of them before I am even done baking them all. They are a thin cookie but they have a nice slightly crisp on the outside, chewy on the inside texture. I always bake these on parchment paper though because stick pretty bad, especially if you prefer to make them chewier, rather than crispier because they come off quite easily when cooked crisp but half of them tends to stay on the pan if you go for chewy. Or maybe that is just because I am always pulling them off while still warm and eating them long before they are ready, lol I am not sure. Either way, these taste great and are simply amazing and who here that has gone grain free doesn't miss cereal? ACTUAL cereal with a nice crisp texture that you toss into milk or milk substitute and eat freely? I know I have missed cereal desperately.

But now that I have experimented with my Something Cookies recipe, I have also discovered Something Cereal and it is fabulous in a bowl of Almond Milk. It's crispy, it's satisfying, it's sweet but nourishing, it's the perfect balance. I just make up a batch of Something Cereal, bake it and store in an air-tight container. Then for the next few days I can eat cereal and Almond Milk and be happy as a clam for breakfast. Well I suppose I should get to sharing the recipe, now shouldn't I?

Something Cereal before being baked.

"Something" Cookies:
We call these "Something" Cookies because everytime someone take a bite of one of these cookies for the first time they always say "This tastes just like something!" and my family has been back and forth about what they may or may not taste like but one thing is for sure, they taste absolutely amazing! and they remind
everyone of "Something"

1 cup Almond Flour
1/4 Teaspoon Baking Soda
1/4 Teaspoon Sea Salt
1/2 cup Maple Syrup
1 Egg OR Flax/Chia Gel if you are allergic to Eggs, though I haven't tried this, it should work.

Just throw all these ingredients into a single bowl and mix with a wooden spoon, couldn't be simpler. After it is all stirred together, you will see this is an incredibly runny cookie dough. That's okay, because you can just take a spoon or measuring spoon and spoon some out onto parchment paper lined baking pans. You may or may not want to butter or grease the parchment paper, I never do but it can stick if you don't. Smaller amounts are better because this will spread. I usually do about 1/4 of a tablespoon size cookies. Bake at 350 degrees for 10-15 minutes. I know that is quite a discrepancy but it depends on how crisp you want them. I usually do 12 minutes for my cookies.

***NOTES:  The longer you bake, the more crisp they will be. The less time you bake them, the harder they will be to remove from the parchment paper. Always allow to cool for several minutes before trying to remove them. The center of cookies that are baked less will be almost caramel like. The less you bake them, the chewier they will be when they are cooled. The longer you bake them, the crispier they will be when cooled and the easier they will be to remove from the pan after cooling. These cookies come out quite thin but they make up for it in flavor.
****TIPS: These would make great sandwich cookies if you put frosting in the middle OR they would be excellent Grain Free/Gluten Free ice cream sandwich cookies. 

*    "Something" Cereal:
Follow the same recipe as above only put tiny drops of batter, the size you desire. I aimed for about Pea sized drops and after baking they became Dime/Nickel sized cookie bites. Bake at 350 degrees for 5-10 minutes depending on taste, you really do want these crisp, so try to let them bake until thoroughly cooked crisp. When cooked crisp they slide right off the parchment paper, even without buttering or greasing the
paper. Then store in a ziplock bag or air tight container and use as cereal, in a bowl of whatever milk or milk alternative that you want. Or you could use them as bite size cookies, snacks, trail mix addition or put them on top of ice creams, custards, etc. These are great in Almond Milk!


Until next time, Happy, Healthy baking to all!

Anyone tried making these? How did they turn out? Any suggestions for what else could be done with these? Or do you have a Grain Free Cereal recipe? Feel free to share in the comments below.

I participated in the Healthy 2Day Wednesday Link-Up! and the Monday Mania Blog Carnival!

Monday, February 6, 2012

Apple Cinna-Mini Muffins


Don't let the picture fool you, these are absolutely delicious! Even my junk food junkie, conventional food eating friends like them. A.K.A. People who eat wheat, grains, gluten, refined sugar and junk food in general. Now that is saying something. I just created this recipe tonight and after eating four of them, I decided it was definitely time to post these little babies. There isn't much rise to the batter so you can feel free to fill to the top of the muffin pans but aside from that, they are simply scrumptious! Very easy to throw together, as I mentioned earlier, I didn't even use a recipe, I just wrote everything down as I added it to the bowl. They have a very lovely, lightly crispy exterior and a soft, moist interior. Wonderful flavor and great for fixing a sweet craving. I could see these being a fabulous breakfast, snack or dessert. They might be muffins but they are not your typical bland and somewhat flavorless muffins, they almost count as cupcakes considering how tasty and satisfying they are.

Apple Cinna-Mini Muffins

1/4 Cup Tapioca Flour - (I REALLY love this stuff!)
2/3 Cup Almond Meal (You could use Almond Flour here too if it's all you've got.)
4 Tablespoons Almond Flour
3/4 Teaspoon Baking Soda
1/4 Teaspoon Salt
1 Teaspoon Cinnamon
1/4 Teaspoon Nutmeg
1/8 Cup Maple Sugar OR other Granulated Sweetener Equivalent
4 Tablespoons Applesauce
1/4 Cup Maple Syrup OR Honey, Agave or Other Similar Liquid/Syrup Sweetener.
2 Tablespoons Melted Butter - Or Oil if you are doing Dairy Free.
1/2 Teaspoon Molasses
2 Eggs OR - Flax or Chia Eggs if doing Egg Free, I have not tested how well this works though.
1 Apple, Peeled, Cored and Finely Diced

Place Tapioca Flour, Almond Meal, Almond Flour, Baking Soda, Salt, Cinnamon, Nutmeg and Maple Sugar in a bowl, mixing well. Add Applesauce, Maple Syrup, Melted Butter, Molasses and Eggs, stirring until well combined. Mix in Finely Diced Apple and spoon into a Mini Muffin Pan. I did not grease, oil or butter my pans and they did not stick bad at all but you may still want to grease, oil or butter your pans for easy release. Bake at 325 degrees for 18-23 minutes. Mine took exactly 20 minutes to perfection but every oven is different. You could probably do these as full size muffins or even bread but I do not have the baking times or temps for those. Makes approximately 2-1/2 to 3 dozen Mini Muffins.

Warning:
Be warned though, if you make these... they go really quickly.  Yum!
- Also on a side note, if you don't care for fairly sweet things, you may want to cut back on the sweetener in this recipe. I really wanted something sweet since I spent over an hour staring at bakery, snack cakes and sweets in the grocery store, so I made them nice and sweet. However if you opt for a less sweet version, just cut the Maple Sugar/Granulated Sweetener out, it wont change the consistency at all. If you want it even less sweet than that, replace some of the Maple Syrup with equal amounts Applesauce to keep the moisture ratio and consistency the same.

This picture seriously doesn't do it justice, they are much cuter in person. My apologies, I have to learn how to use Macro on my Digital Camera so I can get clearer, up-close shots. Bear with me folks.

Until then, have fun and - Happy, Healthy Baking!
Baked anything delicious lately? Comment and share with us! 
Have you tried baking these? Did you alter the recipe or bake them exactly? How did they turn out?

Tuesday, January 24, 2012

That Really Takes The Cake!


Everyone will always run into an occasion where they cake and a good cake is not always easy to find. This cake is already fairly allergy friendly and can be made to be even more allergy friendly and tailored to special dietary needs. When holidays, special occasions and birthdays roll around, people typically think of cake as being part of the package. I know that at least my opinion, no special occasion is complete without a special dessert to help celebrate the moment. This cake is not only very healthy for being a cake, it is also easily altered to fit any diet and be allergy free. Might I say, it is also incredibly delicious! Light, fluffy and entirely satisfying. The Chocolate Cake, combined with the two types of frosting make this cake nearly gourmet, each bite an adventure as though every bite cleanses the palate before descending into the depths of yet another flavor. Okay... on to the cake!

Chocolate Cake
3/4 Cup Coconut Flour
1/2 Cup Cocoa Powder
1 Teaspoon Sea Salt
1 Teaspoon Baking Soda
10 Eggs OR Egg Replacer OR Flax/Chia Egg  (See NOTES below, on how to do this.)
1 Cup Melted Butter OR Butter Substitute
1 Cup Maple Syrup OR other Equivalent Liquid Sweetener
1 Teaspoon Molasses

Preheat oven to 350 degrees. Oil the sides and lay parchment circles in the bottoms of two 8″ or 9" cake pans and set aside. Mix the Maple Syrup, Cocoa Powder and Molasses in a bowl, whisk until well combined. It should look a lot like Chocolate Syrup. In another  bowl mix Coconut Flour, Sea Salt and Baking Soda. In a large bowl whisk 10 eggs, then mix in the chocolate mixture and mix chocolate/egg mixture into the dry ingredients. Pour the batter into pans and bake for approximately 35 minutes or until toothpick inserted in center comes out clean. Let cakes cool and remove from pans.

Coconut Pecan Frosting
1 Cup Maple Syrup, Honey, Agave, Brown Rice Syrup or other Syrup or a combination to equal 1 Cup.
1/4 Cup Butter OR Butter Substitute if doing Dairy Free
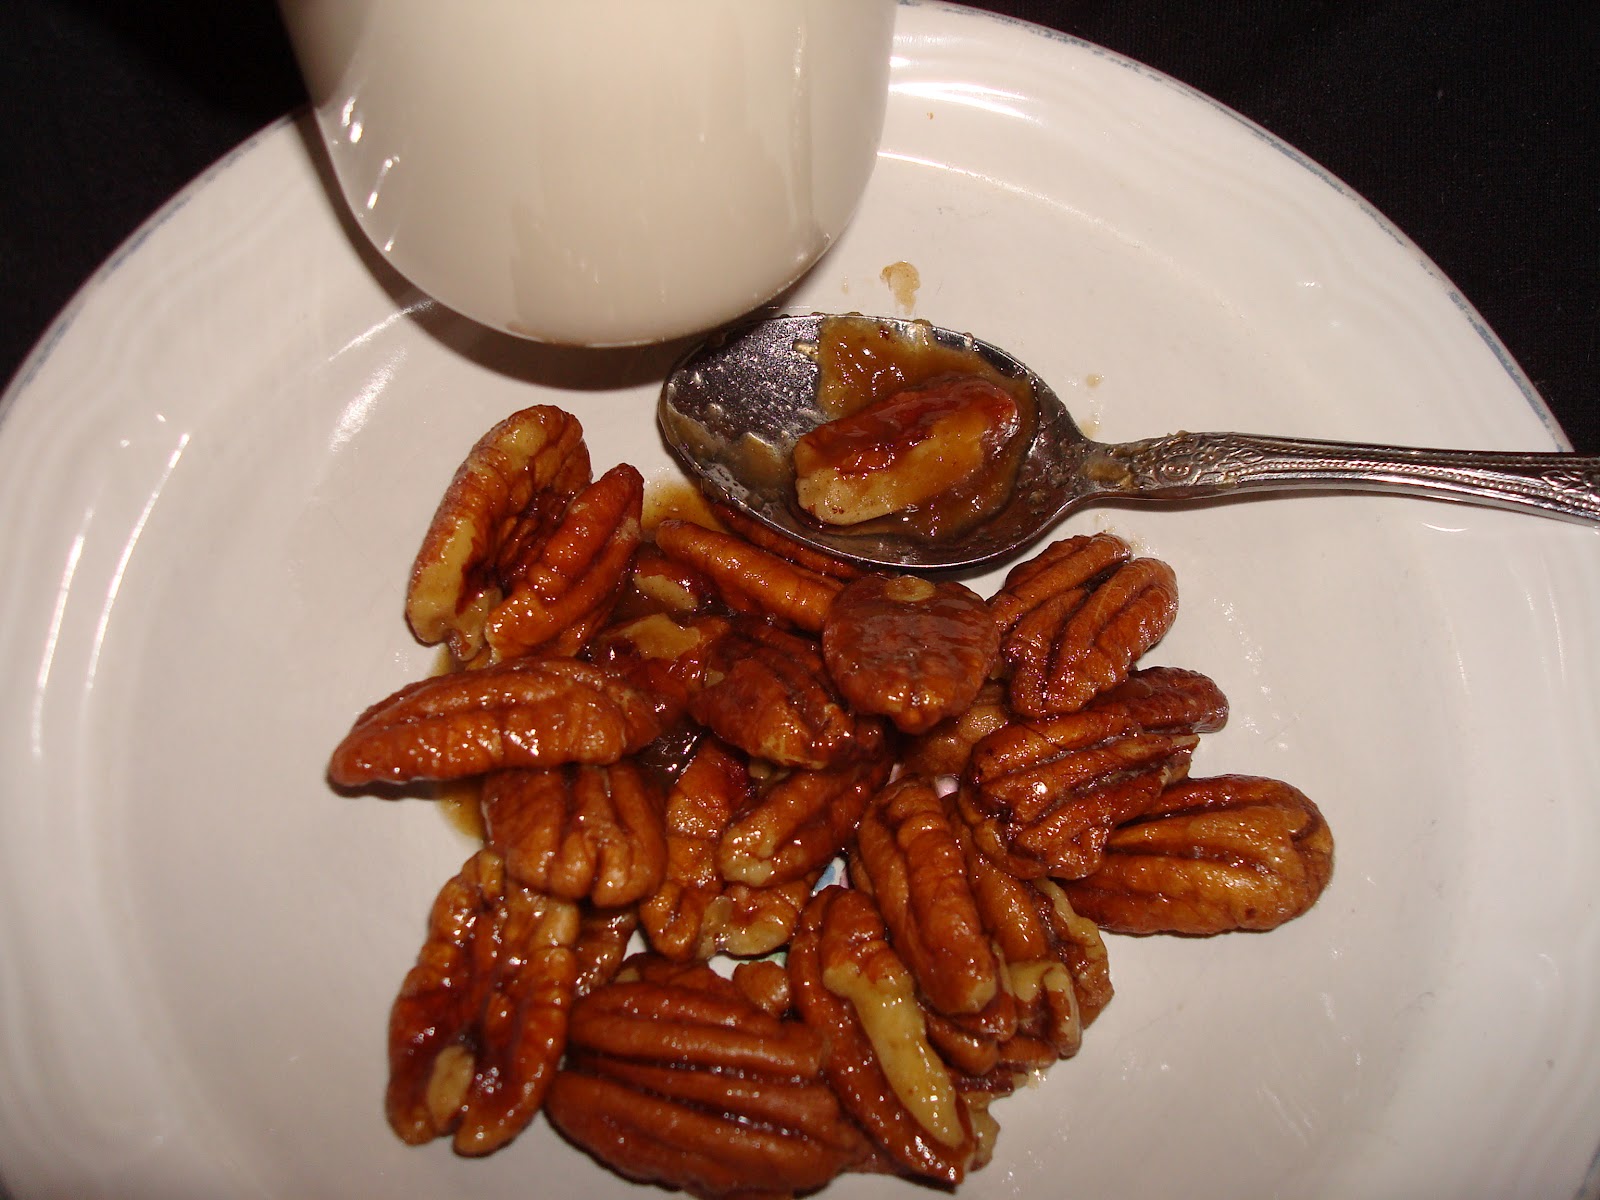
1/4 Cup Ground Pecans
1-1/4 Cups Unsweetened, Shredded Coconut
2 Tablespoons Milk or Milk Substitute
2 Tablespoons Arrowroot Powder + 2 Tablespoons Milk or Milk Substitute, mixed

Mix Maple Syrup and Butter in a sauce pan over Medium to Medium-High heat, stirring constantly until melted and combined. Bring to a heavy simmer, still stirring. Stir in the Milk, Ground Pecans and Shredded Coconut and simmer 2-3 minutes. In a small dish mix the Arrowroot Powder and 2 additional Tablespoons Milk together and then add to the Coconut Pecan Frosting Mixture. Continue to cook another 1-3 minutes until thickened. Remove from heat and allow to cool, it will continue to thicken more as it stands.  Spread this frosting between the two layers of the cake and of course, on top of the cake. It is too runny to frost the sides, it slides right off but the double frosting duo on this cake is what adds the extra special kick to it.

Chocolate Side Icing
4 oz. (1/2 Cup) Pure Bakers Chocolate OR Dark Chocolate of choice.
1/4 Cup Coconut Oil (I don't know if you can substitute this, Palm Oil or other SOLID at room temperature Oil should work.)
3 Tablespoons Maple Syrup  OR  Honey, Agave or other Syrup of choice.
2 Tablespoons Honey  OR  Maple Syrup, Agave or other Syrup of choice.
1/8 Teaspoon Sea Salt
2 Teaspoon Maple Sugar OR other Granulated Sweetener Equivalent.

In a sauce pan over low heat, melt the chocolate and oil, stirring constantly. Mix in the Maple Syrup, Honey, Maple Sugar and Sea Salt until thoroughly mixed. Remove from heat, place in fridge for a half hour to 45 minutes. Check often to make sure it isn't getting too thick. Remove it from the fridge and with a hand mixer blend on high until light and fluffy. If it is too solid, set sauce pan over bowl of warm water and mix with hand mixer or let stand at room temperature until softened enough. If it is not solid enough it will not whip very well so you'll need to put it back in the fridge for  bit and check it again every few minutes or so. When it is the right consistency, it will beat well with a hand mixer and resemble whipped frosting. Frost the sides of the cake quickly with this because it doesn't perfect for long, it eventually takes on a fudge texture on the outside of the cake.


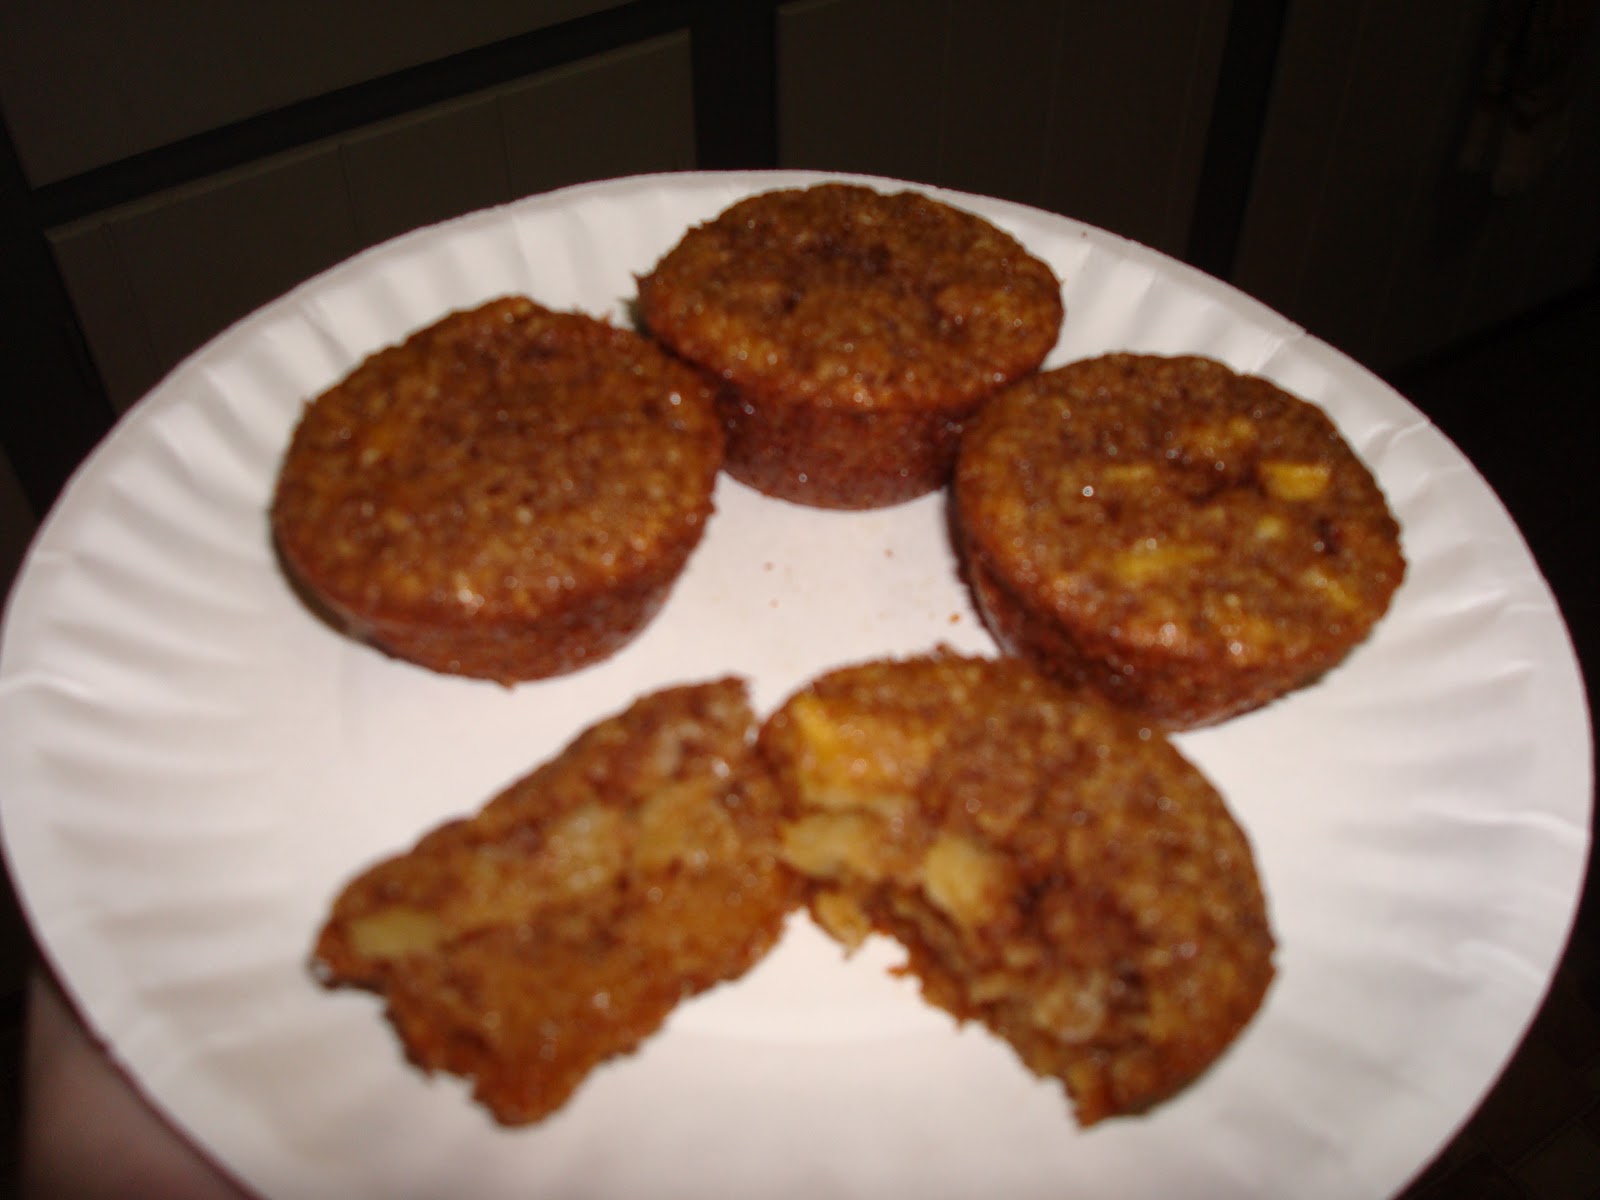
So... If all was done correctly, you have a beautiful, double layer, fluffy, grain free chocolate cake. With two gourmet, home made frosting blends. Chocolate Icing on the side and Coconut Pecan Frosting for the top and center. Now of course you could use any frosting of your choosing or if it is a frosting recipe you are after, one of these two might fit the bill. However be warned, the Chocolate Icing gets very stiff, almost like fudge or a truffle, as a matter of fact, we put little dollops of it into candy cups with the left overs and ate them as candy. Also be warned that Coconut Pecan Frosting is rather thin, so it is great for topping items but may not suit frosting the side of a cake well... which makes it almost ideal for cupcakes if that is what you are making. You could also easily turn this cake recipe into cups and top with either one or a combination of both frostings.  Remember...  The most important thing is to have fun with your baking... and what is more fun than a baking?

Notes
You use 1 Tablespoon Ground Flaxseed whisked into 3 Tablespoons Water and allow it to stand until thickened to replace one egg. Yes... I realize you'd have to do this ten times but if you need Egg Free, if may be worth it... There are many Egg substitutes, Chia Seeds can be used in a similar fashion to replace Eggs, I have also heard of Mashed Banana being used to replace Eggs.

Please feel free to comment and if you make this recipe, let me know how it goes. Also don't forget to stop by the Suggestions page and give me feedback or make a recipe request. I am looking for new and exciting things to try making. More information can be found on the Suggestions page.

I participated in the Healthy 2Day Wednesday Link-Up!

Allergen Free Pudding... Could It Be?


I am not sure if anyone will be interested in these things or not but I love to cook and bake. I love to make traditional and nutritional  foods, with a specialty in Allergen Free Cooking and Baking. Best of all, I love making all of these things DELICIOUS!  Now this pudding is a bit of work but this post is 4 recipes for the price of one and maybe you found your way here only looking for one of these recipes, whatever the case may be, if you are after a tasty, Allergen Free Pudding, this is your lucky day!
If this seems popular or gets any attention at all, I will keep posting and providing wonderful Recipes and Articles on Traditional Foods, Nutritious Eating, Health In General and Allergy Friendly Foods.
On to the recipes!


Caramel Almond Tapioca Pudding
Egg Free, Gluten Free, Wheat Free, Refined Sugar Free AND Dairy Free.  Astounding!

Prepare Tapioca
Pour 1/2 cup Tapioca Pearls (Not Instant Tapioca)and 3 cups water into a 4 quart saucepan and bring to a boil,boil for 20 minutes, covered and allow to sit, covered for 30-45 minutes. Tapioca is done when all the pearls are completely translucent. Pour Tapioca into a strainer and rinse with cool water, running your hand through the Tapioca as you rinse them. Place Tapioca in a bowl and set aside.

Almond Milk
For homemade Almond Milk for the caramel, process 1/4 cup Almonds with 1/2 cup warm water and strain through a sieve or strainer. I used a coffee filter but it took so long I ended up having to "help" it along. You can then puree/process the remaining Almond Milk "Pulp" in your Almond Butter so it doesn't go to waste.

Prepare Almond Butter
1-1/2 cup Almonds 1/4 cup Maple Syrup, Honey OR Equivalent Sweetener of choice.2 Tablespoon Walnut Oil OR other oil of choice.
Pureed and processed in a food processor, until smooth and creamy.


Prepare Maple Caramel Sauce
1/2 Cup Almond Milk, Milk Substitute OR Cows Milk if you are not doing Dairy Free.
1/2 cup Maple Syrup, Honey or Equivalent Liquid Sweetener 2 Tablespoons Butter Substitute, Oil of your choice OR Butter if you are not doing Dairy Free. 2 Tablespoons Maple Sugar or Equivalent Granulated Sweetener 1/8 Teaspoon Molasses
Bring Almond Milk, Butter/Oil, Maple Sugar/Granulated Sweetener and Molasses to a low simmer over low to medium heat.
Once Milk mixture begins to simmer, add Maple Syrup and bring to a heavy simmer for about 15 minutes. Pour from saucepan into a Oiled OR Buttered dish to cool. It will thicken as it cools.

Putting Together The Pudding
In a bowl vigorously mix together all OR part of the Maple Caramel Sauce, I used 1/2 cup, with all OR part of the Home Made Almond Butter, I used 1/2 cup. Once completely mixed together, gently mix with the cooked Tapioca Pearls and you will notice it takes on a lighter, creamier color. If you prepared your Caramel Almond Tapioca Pudding with Milk Substitute and Butter Substitute, the pudding will be Gluten Free, Dairy Free, Egg Free, Wheat Free and Refined Sugar Free.

Suggestions
If you use only half cup of the Almond Butter Recipe, you could always use the other portion to spread on Breads, Bagels, Cookies, Buns, Rolls, Pancakes, Waffles, Crackers, etc. (Gluten Free, Wheat Free or whatever version you may need, depending on dietary needs.) I am somewhat embarrassed to admit that I usually eat my remaining Almond Butter with a spoon before the day ends. You could also put it in the fridge for a bit and attempt to roll or shape it and coat or dip it in melted chocolate or carob.
The leftover Maple Caramel Sauce is AMAZING on Conventional OR Dairy Free Ice Cream, it also goes wonderful on Cinnamon Rolls, Sticky Buns, etc. OR if you are making the Almond Butter into Candy already, you could spread some melted chocolate or carob in some paper candy cups, fill with caramel and spread more melted chocolate or carob on top to make caramel cups. I am even more embarrassed to admit that the Maple Caramel Sauce is SO TASTY that I usually just drizzle little puddles into my palm and eat it straight out of my hand....


Notes
You could probably prepare this recipe with Instant Tapioca by following the cooking instructions on the box. You could also probably just use a 1/2 cup or more of store bought Almond Butter OR other nut/seed butter of choice. You could possibly substitute the Maple Caramel Sauce for plain Maple Syrup, Honey, Agave Syrup, Brown Rice Syrup or other similar syrup.
If you decide to try this recipe, please let me know what variations you used, if you followed it exactly or changed it up a bit on your own and how it turned out. Happy Allergen Free Dessert Making!